If like us you love pigeons then the idea of being able to craft an origami pigeon out of paper is a very exciting concept.
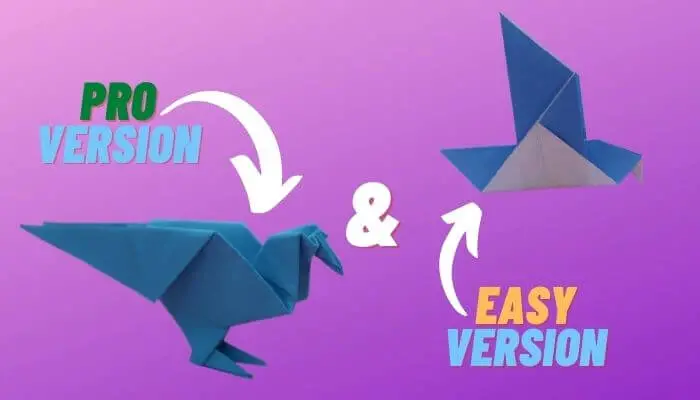
We’ve consulted with some origami experts to get custom step-by-step instructions and video tutorials for two origami pigeons.
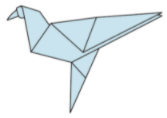
The first is a more complex one that has 30 steps, the second is a far simpler pigeon with only 8 steps, this is better suited to children or people who are new to origami.
Origami Pigeon Instructions
To do this more complex origami pigeon you will need to start with a square piece of paper.
We recommend using A4 and then cutting 8.7cm off the length to make it square.
Once you have a square piece of paper follow these steps to create the origami pigeon:
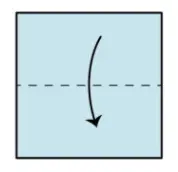
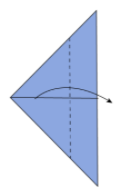
1. Fold In Half Horizontally To Create A Crease
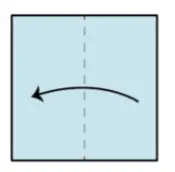
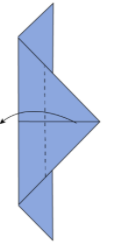
2. Fold In Half Vertically To Create Another Crease
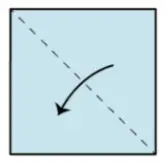
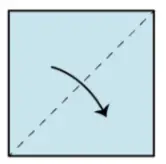
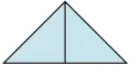
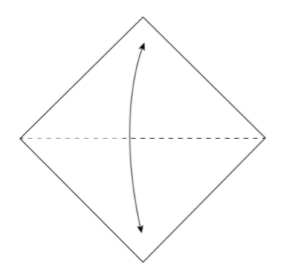
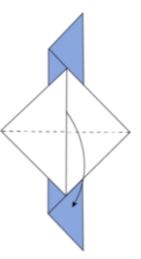
3. Fold In Half Diagonally To Create A Crease
4. Fold In Half To Crease Across The Opposite Diagonal Axes
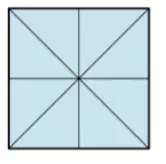
Your paper should now have creases looking like this:
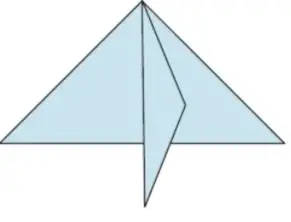
5. Push In From Both Sides To Give It A 3D Effect
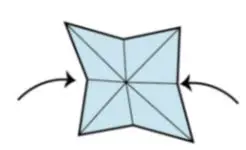
It should look something like this from the top when done correctly:
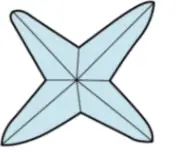
The side profile will look similar to this:
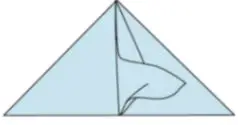
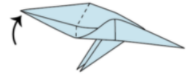
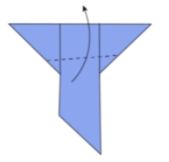
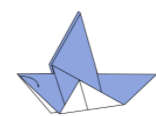
6. Fold The First Flap Upwards Across The Dotted Line To Create A Crease
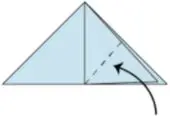
7. Unfold it

8. Fold The First Flap Along The Dotted Line To Form A Crease
9. Fold It Out
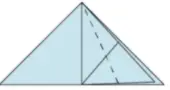
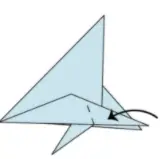
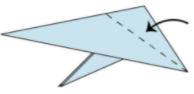
10. Using The Lines As A Reference Follow Steps 11-13 To Shape Out The Triangle
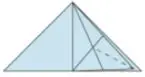
11.
12.
13.
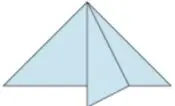
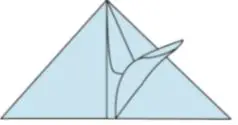
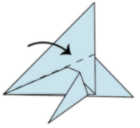
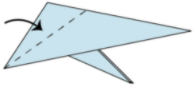
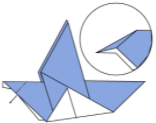
11. Repeat Steps 6-9 On The Flap To The Left
12. Repeat Steps 10-13 On The Same Flap
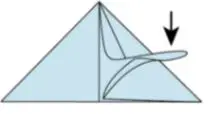
13. Turn It Over

14. Fold In Half Along The Dotted Lines
15. Fold Along The Dotted Lines
16. Fold Down Along The Dotted Lines
17. Turn It Over
18. Repeat Steps 15 & 16 On The Opposite Side
19. Fold Along The Dotted Line
20. Fold Along The Dotted Line
21. Turn It Over

22. Fold Along The Dotted Line
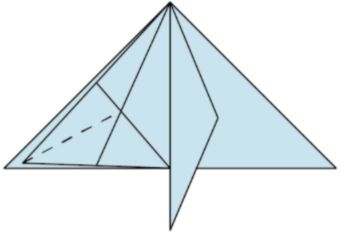
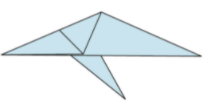
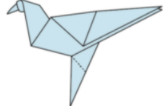
It should now look something like this..
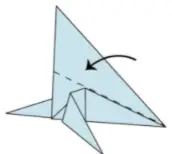
23. Turn It Over & From On The Top Make A Crease Along The Dotted Line
24. Pull The Left Tip Upwards
25. Fold Inwards Along The Dotted Line

26. Shape The Beak
27. Fold Upwards Along The Dotted Line
28. Turn Over & Repeat Step 27 On The Opposite Side
29. Unfold The Last Two Steps And Make An Inside Reverse Fold To Create The Legs
30. Unfold And Create A Reverse Fold To Make The Feet Stable
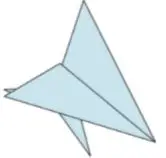
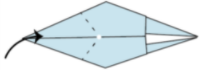
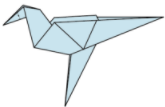
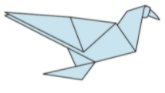
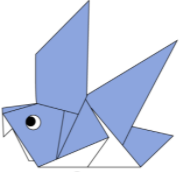
That’s it, your origami pigeon is complete:
Easy Origami Pigeon Instructions
This far simpler origami pigeon only has 8 steps.
You will need one square piece of paper to make this pigeon.
We recommend using A4 and then cutting 8.7cm off the length to make it square.
Once you have a square piece of paper follow these steps to make the simple Origami Pigeon:
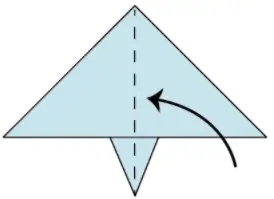
1. Fold In Half
2. Fold Across The Dotted Line:
The fold should be a couple of centimeters (or less if you find you are struggling) from the edge of the paper to make it easier to do the next few steps.
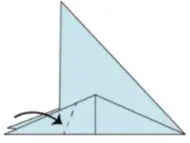
3. Fold The Tips Down Across The Dotted Line On Both Sides
Make sure that the folds
4. Fold In Half Along The Dotted Line
5. Fold The ‘Wings’ Up On Both Sides
6. Fold The Corner Down To Make A Crease
7. Fold Across The Dotted Line To Make A Beak
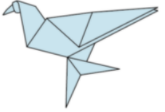
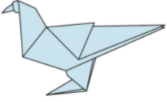
8. Draw Eyes, Spread Out The Wings & You’re Finished!
We hope you enjoyed making your origami pigeon!