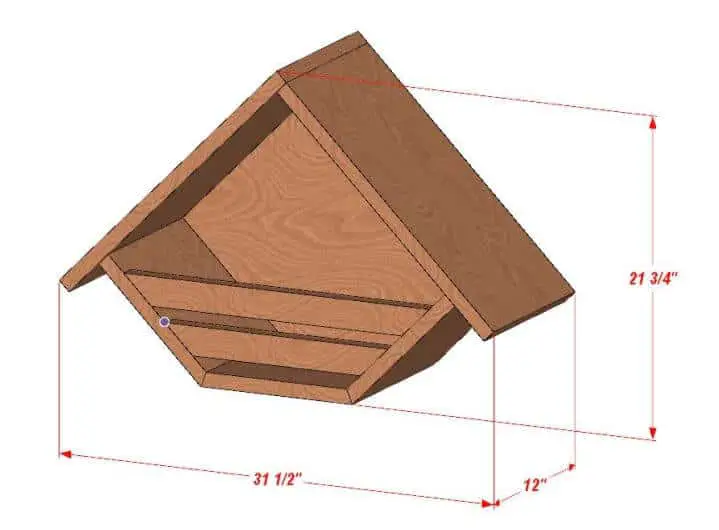
If you’re looking to build your own nest box this article explains exactly how to build the stunning nest box pictured below:

The total cost for this build not including tools should stand at around $30.
Recommended Tools:
- Mitre saw
- Circular saw
- Drill
- Screw drive
- Tape measure
- Pencil
- Safety glasses
- Spirit level
| Estimated cost: |
|---|
| $30 (prices will vary depending on your location) |
Pigeon Nest Box PDF
If you’d prefer to download and print off a PDF off our nest box plans and cut list so you have a working copy then you can do so by clicking the button below:
Pigeon Nest Box Cut List
Ensure that you have all the lumber and plywood listed below cut to the correct size before you start assembling the nest box.
| Name | Material | Property | Length | Width | Quantity | Note |
|---|---|---|---|---|---|---|
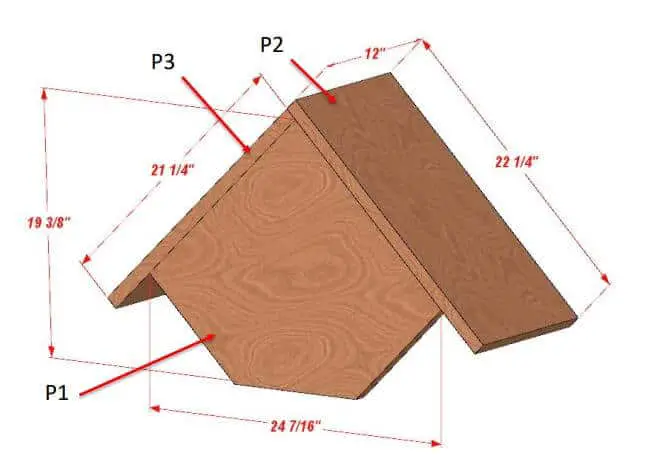
| P1 | Plywood 1” | Cutout | 19 3/8″ | 24 7/17″ | 1 | Back |
| P2 | Plywood 1” | 22 1/4″ | 12″ | 1 | Top left | |
| P3 | Plywood 1” | 21 1/4″ | 12″ | 1 | Top right | |
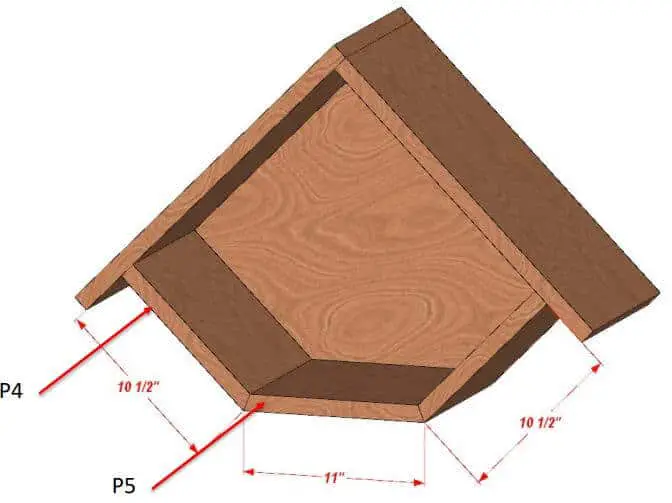
| P4 | Plywood 1” | Angle Cut | 10 1/2″ | 12″ | 2 | Front left/right |
| P5 | Plywood 1” | Angle Cut | 11″ | 12″ | 1 | Front bottom |
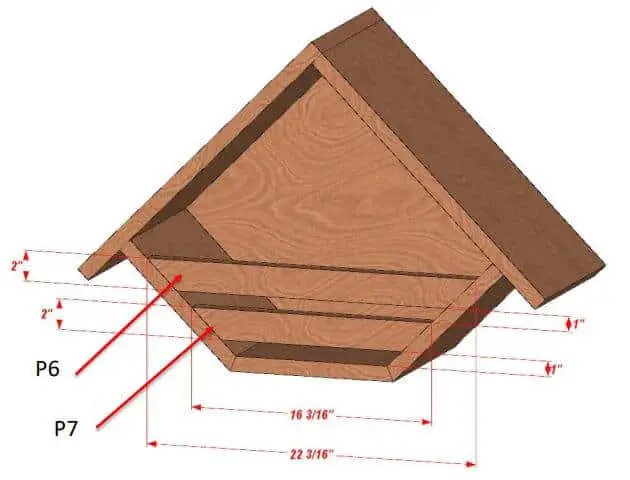
| P6 | Plywood 1” | Cutout | 22 3/16″ | 2″ | 1 | Long lintel |
| P7 | Plywood 1” | Cutout | 16 3/16″ | 2″ | 1 | Short lintel |
Pigeon Nest Box Building Plans – Step By Step Visual Guide
1. Fit The Roof

Attach the back panel to the roof panels using 2″ screws or nails.
2. Attach The Front Flooring Panels

Attached the front and floor panels securely to the back panel and roofing panels using 2″ screws or nails.
3. Fit The Lintels

Fit the lintels across the front of the nesting box and secure them with screws, nails or high-quality wood glue.
4. Paint/Varnish It
Finish the nesting box off by painting or varnishing it to make it more durable against the weather.
5. Enjoy Your New Pigeon Nesting Box
It’s done and should look something like this:

We hope you enjoy it as much as the pigeons and doves will no doubt enjoy nesting in it.
Looking for more pigeon-related DIY projects?
Try these:
